Details
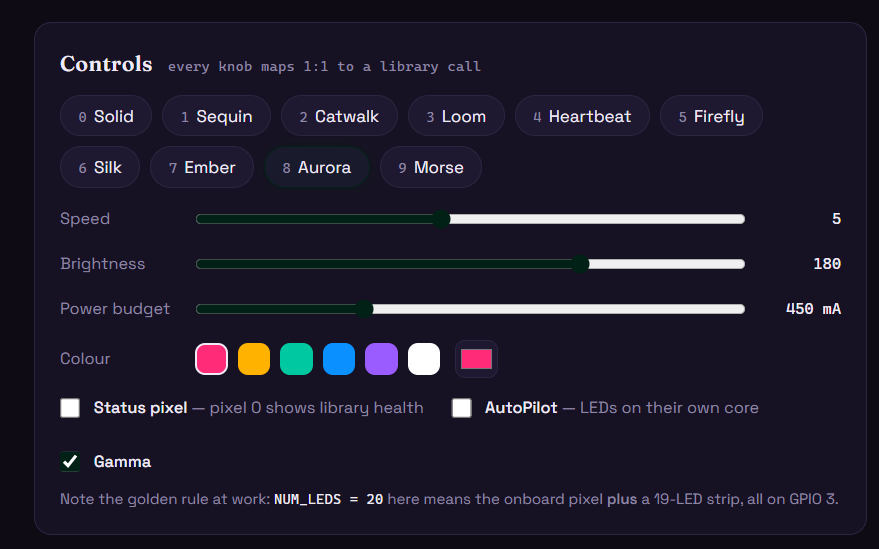
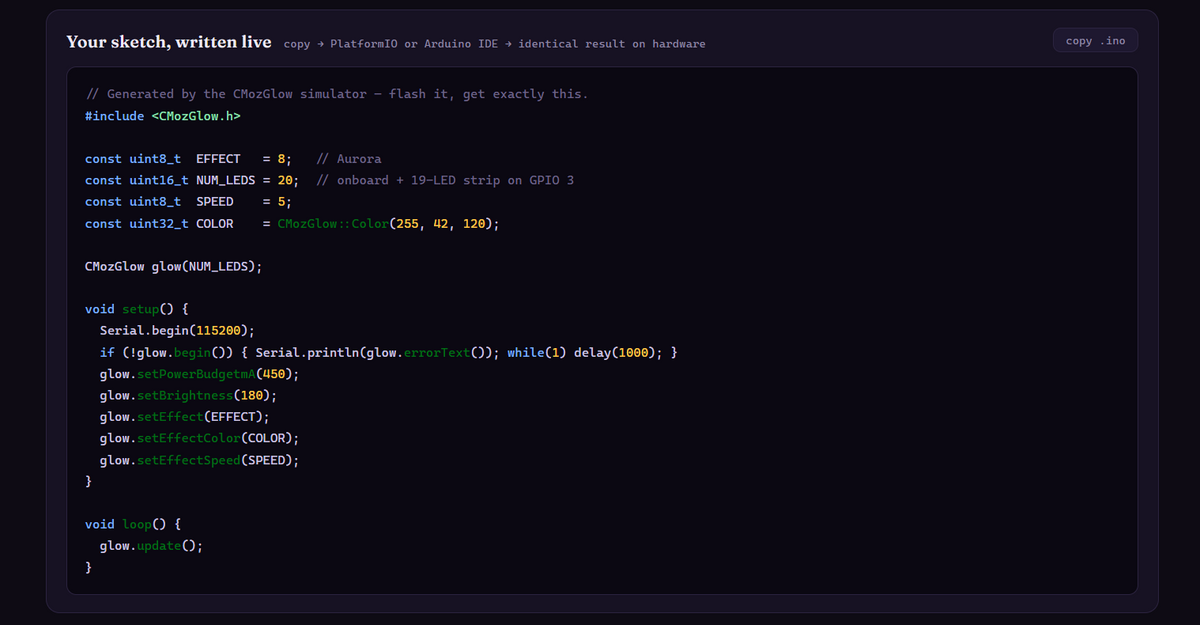
--> Want the code written for you and you change the effects? Interactive code generator
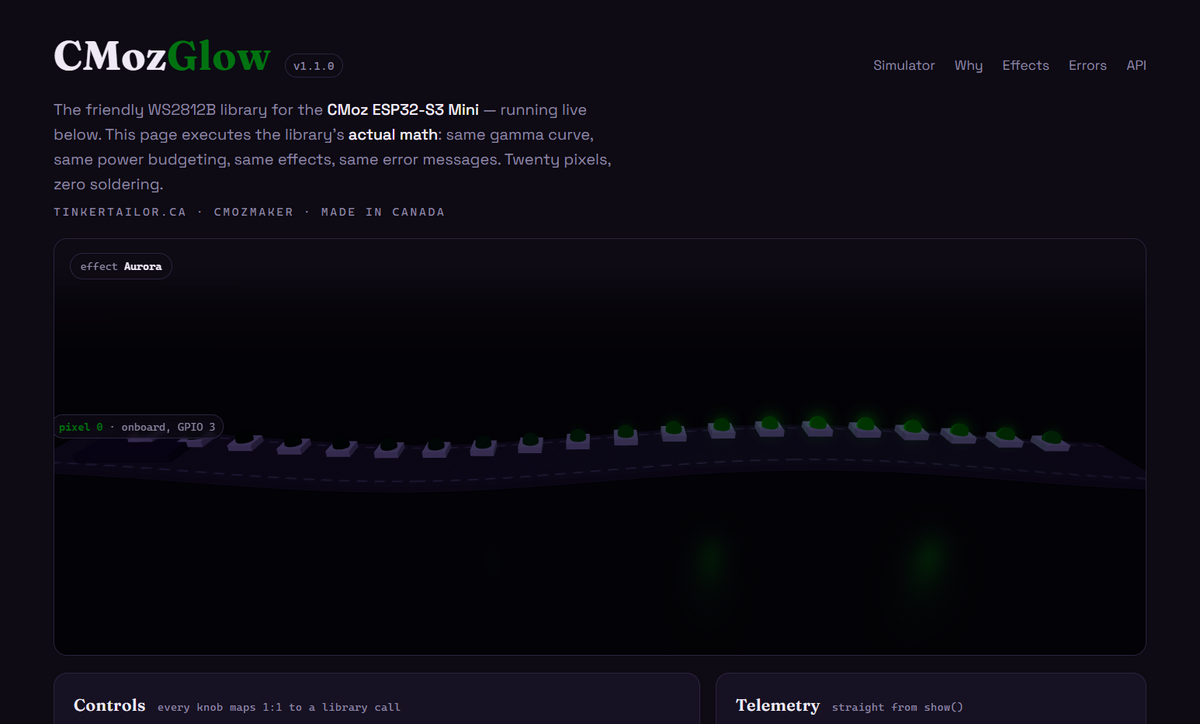
Your CMoz ESP32-S3 Mini (arriving 2027) already has one addressable LED on board (on GPIO 3). This library makes it — and any strip you add — glow beautifully with about five lines of code, and it talks to you in plain English when something goes wrong.
Note: this library can be used with other boards and a huge selection of ws2812b (neopixels).
| CMozGlow | Typical LED libraries | |
|---|---|---|
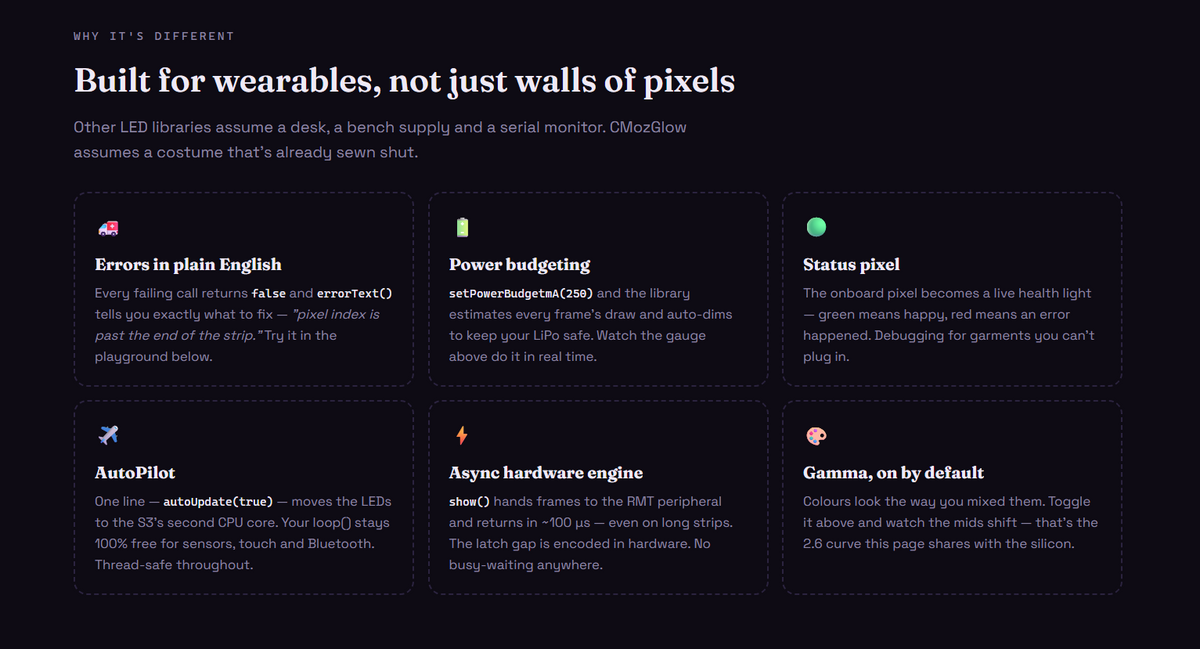
| Error messages in plain English | ✅ errorText() tells you exactly what to fix |
❌ silent failure or a crash |
| Battery-safe power budgeting | ✅ set a mA limit, it auto-dims to stay under it | ⚠️ hidden or missing |
| Live status pixel | ✅ onboard pixel: green = happy, red = error | ❌ |
| Non-blocking effects built in | ✅ update() in loop() — no delay() anywhere |
⚠️ examples usually block |
| Async hardware engine | ✅ show() returns in ~100 µs even on long strips |
⚠️ blocks ~30 µs × LED count |
| AutoPilot dual-core mode | ✅ one line gives the LEDs their own CPU core | ❌ |
| Fashion-tech effects | ✅ Sequin, Catwalk, Loom, Silk, Aurora, Morse… | ❌ mostly rainbows |
| Gamma-corrected colour | ✅ on by default — colours look how you mixed them | ⚠️ off by default |
Because effects never block, your buttons, sensors and Bluetooth code keep running while the lights animate — essential for interactive wearables.
PlatformIO — add the library folder to your project's lib/ directory, or once published:
; platformio.ini
[env:cmoz_s3_mini]
platform  = espressif32
board     = esp32-s3-devkitc-1
framework = arduino
lib_deps  = cmoz/CMozGlow @ ^1.2.2

Arduino IDE — Sketch → Include Library → Add .ZIP Library… and pick CMozGlow.zip. Then in Tools:
- Board: ESP32S3 Dev Module
-
USB CDC On Boot: Enabled ← don't skip this! It's how
Serial(and CMozGlow's friendly error messages) reach the Serial Monitor over the USB port.

Open File → Examples → CMozGlow → CMozGlow_Basics, or paste this:
#include <CMozGlow.h>

// ══════════ CHANGE THESE ══════════
const uint8_t  EFFECT   = 8;    // 0-9, table below
const uint16_t NUM_LEDS = 1;    // onboard only = 1
const uint8_t  SPEED    = 5;    // 1 dreamy … 10 party
const uint32_t COLOR    = CMozGlow::Color(255, 42, 120);
const uint8_t  LED_PIN  = 3;    // GPIO 3 = onboard pixel; change for other boards
// ══════════════════════════════════

CMozGlow glow(NUM_LEDS, LED_PIN);

void setup() {
  Serial.begin(115200);
  if (!glow.begin()) {
    Serial.println(glow.errorText());   // it tells you what to fix!
    while (true) delay(1000);
  }
  glow.setPowerBudgetmA(450);           // safe on USB or a small LiPo
  glow.setEffect(EFFECT);
  glow.setEffectColor(COLOR);
  glow.setEffectSpeed(SPEED);
}

void loop() {
  glow.update();                        // that's it!
}
Upload it. The onboard pixel should start dancing the aurora. Change the EFFECT number, re-upload, repeat. That one constant is the whole tour.
Connect your WS2812B strip's DIN to GPIO 3, GND to GND, and 5V to a suitable supply. The onboard pixel becomes pixel 0 and your strip continues from pixel 1.
🧵 Golden rule:
NUM_LEDS = 1 + your strip length. A 12-LED strip meansNUM_LEDS = 13.
GPIO 3 is only the default, because that's where the CMoz board's onboard pixel lives. Any valid output pin works — pass it as the second argument:
CMozGlow glow(NUM_LEDS, 6); // 20 LEDs on GPIO 6
Every example has a LED_PIN constant at the top for exactly this. And CMozGlow isn't CMoz-only — it runs on any ESP32-family board: ESP32-S3, ESP32-S2, ESP32-C3 and the classic ESP32. It knows each chip's real pinout and will tell you in plain English if you pick a pin that can't drive LEDs:
| chip | pins that work |
|---|---|
| ESP32-S3 | 0–21, 33–48 |
| ESP32-S2 | 0–21, 33–46 |
| ESP32-C3 | 0–10, 18–21 |
| classic ESP32 | 0–5, 12–19, 21–23, 25–27, 32, 33 |
On a board without an onboard pixel, NUM_LEDS is simply your strip length — the golden rule above only applies to boards like the CMoz that have one built in.
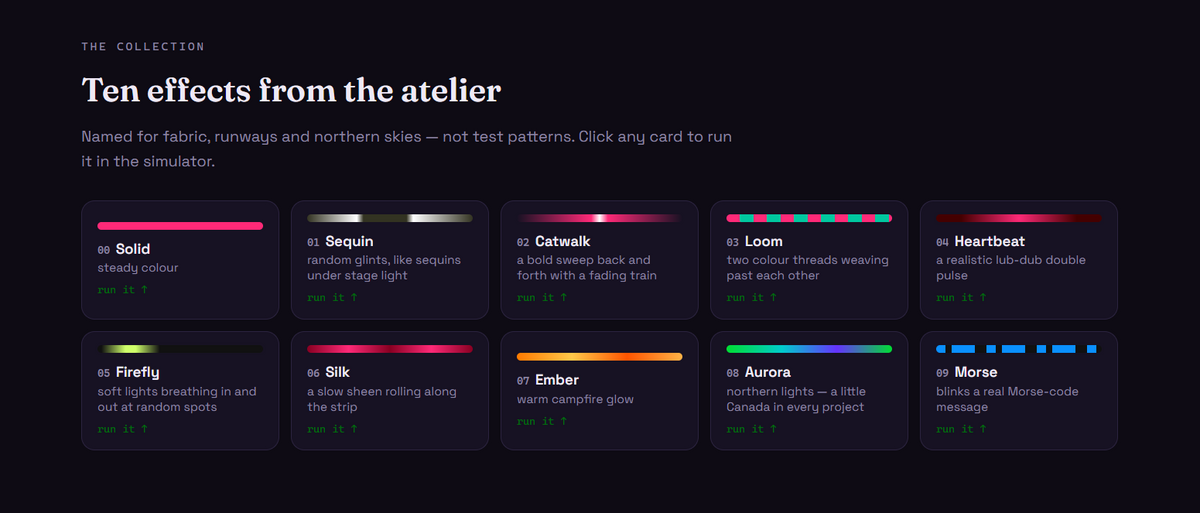
| # | Name | Constant | What it looks like |
|---|---|---|---|
| 0 | Solid | CMOZ_FX_SOLID |
steady colour |
| 1 | Sequin | CMOZ_FX_SEQUIN |
random glints, like sequins catching stage light |
| 2 | Catwalk | CMOZ_FX_CATWALK |
a bold sweep back and forth with a fading train |
| 3 | Loom | CMOZ_FX_LOOM |
two colour "threads" weaving past each other |
| 4 | Heartbeat | CMOZ_FX_HEARTBEAT |
realistic lub-dub double pulse |
| 5 | Firefly | CMOZ_FX_FIREFLY |
soft lights breathing in and out at random spots |
| 6 | Silk | CMOZ_FX_SILK |
a slow sheen rolling along the strip, like light on fabric |
| 7 | Ember | CMOZ_FX_EMBER |
warm campfire glow |
| 8 | Aurora | CMOZ_FX_AURORA |
northern lights 🇨🇦 |
| 9 | Morse | CMOZ_FX_MORSE |
blinks a real Morse-code message |
All effects respect setEffectColor() (except Ember and Aurora, which use their own palettes) and setEffectSpeed(1–10).
Morse tip: set your message first — glow.setMorseMessage("MEET AT 9"); — letters, digits and spaces, up to 63 characters. Fantastic for badges and classroom decoding challenges.
Each WS2812B can pull up to 60 mA at full white. Thirteen pixels at full white is nearly 0.8 A — more than USB or a small LiPo should give.
CMozGlow protects you:
glow.setPowerBudgetmA(450); // never draw more than ~450 mA
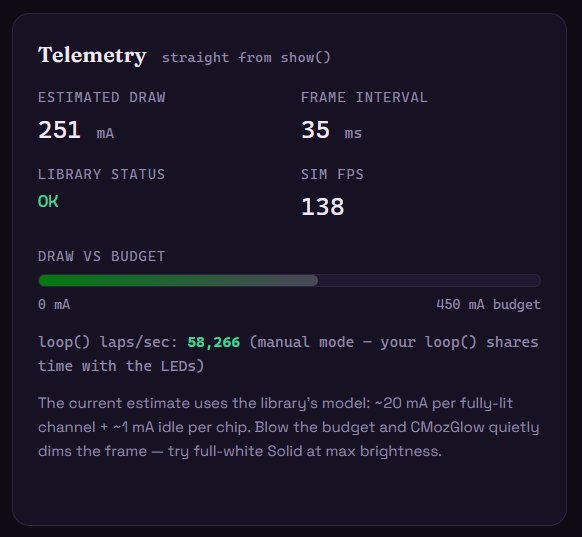
Before every frame the library estimates the current draw and, if you'd blow the budget, quietly dims the frame to fit. You can check what happened:
Serial.println(glow.estimatedCurrentmA()); // approx draw of the last frame
Serial.println(glow.powerLimited());       // 1 if it had to auto-dim
Suggested budgets: USB port ≈ 450 mA, small LiPo (400 mAh) ≈ 250 mA, dedicated 5 V/2 A supply ≈ 1500 mA. The estimate is an approximation (~20 mA per fully-lit colour channel + ~1 mA idle per chip) — always leave headroom.
The ESP32-S3 has two processor cores, and your sketch's loop() runs on core 1. AutoPilot starts a small background task on core 0 that animates the LEDs forever:
glow.setEffect(CMOZ_FX_AURORA);
glow.autoUpdate(true);      // ✈️ take off — no update() needed ever again
That's it. Your loop() is now 100% free for sensors, Bluetooth, touch and servos — the animation literally runs on different silicon. Every CMozGlow call stays safe to use mid-flight (setEffect(), setPixel(), setBrightness(), colours, speed — all of it), because the whole library is guarded by a recursive mutex. Land it any time with glow.autoUpdate(false); autoRunning() tells you the current state.
Good to know:
-
When to use it — interactive projects where
loop()does real work: capacitive touch sampling, BLE, audio-reactive code, servo easing. For a simple "lights only" sketch, plainupdate()inloop()is all you need. -
Manual
show()/update()calls are safe but pointless in flight — AutoPilot already renders on schedule, and the frame timer prevents double-drawing. - Core 0 is also the Wi-Fi/BLE core. The render task is light (priority 1, sleeps between frames), so they coexist happily — but if you're pushing heavy Wi-Fi traffic and 500+ LEDs, test your timing.
-
It lands cleanly.
autoUpdate(false)andend()wait for the task to confirm it has stopped and for the hardware to finish the frame in flight before touching any memory. No dangling tasks, no use-after-free — ever.
Try File → Examples → CMozGlow → CMozGlow_AutoPilot: it counts loop() laps per second so you can see how free your sketch is.
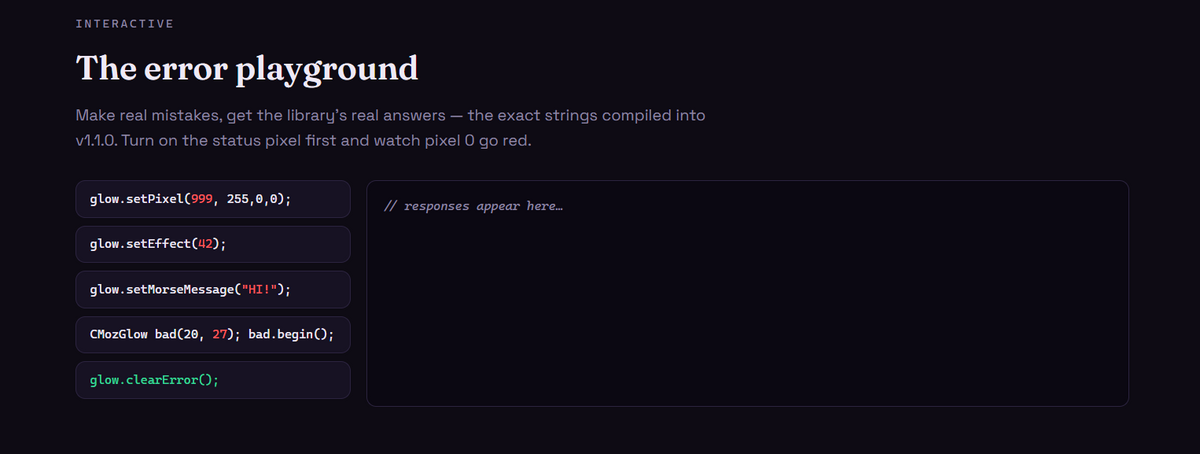
Every call that can fail returns false and records a reason:
if (!glow.setPixel(999, 255, 0, 0)) {
  Serial.println(glow.errorText());
  // "pixel index is past the end of the strip — indexes run 0 to numPixels()-1"
}
Turn the onboard pixel into a live status light — perfect while debugging a costume you can't plug a Serial monitor into:
glow.statusPixel(true); // pixel 0: dim green = happy, red = an error happened
| Code | Meaning |
|---|---|
CMOZ_OK |
everything is fine |
CMOZ_ERR_NOT_BEGUN |
begin() wasn't called or failed |
CMOZ_ERR_BAD_PIN |
that GPIO can't drive LEDs (use 0–21 or 33–48) |
CMOZ_ERR_BAD_COUNT |
LED count must be 1–2000 |
CMOZ_ERR_ALLOC |
out of memory (very long strip) |
CMOZ_ERR_RMT |
the LED peripheral failed to start |
CMOZ_ERR_INDEX |
pixel index past the end of the strip |
CMOZ_ERR_BAD_EFFECT |
effect number doesn't exist (valid: 0–9) |
CMOZ_ERR_BAD_ARG |
argument out of range |
CMOZ_ERR_TASK |
AutoPilot's background task couldn't start or stop |
Use glow.lastError() for the code, glow.errorText() for the sentence, glow.clearError() to reset.
CMozGlow glow(numLeds);            // GPIO 3 by default
CMozGlow glow(numLeds, pin);       // or any valid ESP32-S3 output pin

bool begin();                      // call once in setup(); false = check errorText()
void end();

// pixels
bool setPixel(i, r, g, b);         // 0-255 each
bool setPixel(i, color);           // packed 0xRRGGBB
uint32_t getPixel(i);
void fill(color);
void clear();
bool show();                       // hand the frame to hardware; returns in ~µs
uint16_t numPixels();

// look & feel
void setBrightness(0-255);         // non-destructive master dimmer
void setGamma(true/false);         // gamma correction, on by default

// wearable safety
void setPowerBudgetmA(mA);         // 0 = unlimited
uint16_t estimatedCurrentmA();
bool powerLimited();

// effects (non-blocking)
bool setEffect(0-9);               // or CMOZ_FX_… constants
void setEffectColor(color);
bool setEffectSpeed(1-10);
bool setMorseMessage("TEXT 123");
bool update();                     // call every loop(); true when a frame drew
static const char* effectName(id);

// AutoPilot (advanced)
bool autoUpdate(true/false);       // give the LEDs their own CPU core / land
bool autoRunning();

// errors
CMozError lastError();
const char* errorText();
void clearError();
void statusPixel(true/false);      // onboard pixel as live status light

// colour helpers
CMozGlow::Color(r, g, b);          // pack a colour
CMozGlow::Wheel(0-255);            // spin around the rainbow
Nothing lights up. Check Serial for a message from errorText() first. Then: does LED_PIN match the pin your strip's DIN is actually on? Do the strip and board share a GND? Is NUM_LEDS at least 1?
Only the onboard pixel works. NUM_LEDS is probably still 1 — remember to add your strip length. Also check the strip's arrow points away from the board (data flows in one direction).
Colours look dim. That's likely the power budget doing its job — check powerLimited(). Raise the budget only if your power source can handle it.
Colours look "wrong" compared to another library. CMozGlow gamma-corrects by default so mixed colours look natural. For raw values call glow.setGamma(false);.
First pixel flickers with a long strip. Long wire runs benefit from a 300–500 Ω resistor in the data line and a 500–1000 µF capacitor across the strip's power — both available at TinkerTailor.ca. 😉
It compiles and runs, but the Serial Monitor shows nothing. In Tools, make sure Board = ESP32S3 Dev Module and USB CDC On Boot = Enabled, then re-upload. Without CDC enabled the S3 sends Serial to a UART you're not connected to.
A ctags "cannot open temporary file" error before compiling (Windows). Not your sketch — it's stale files in Windows' temp folder. Close the IDE, press Win + R, type %TEMP%, delete what's there, and try again.
It compiles but begin() returns false. Print errorText() — it will name the exact problem (bad pin, too many LEDs, out of memory, or the RMT peripheral being used by another library).
Using conductive thread? Keep the data run short and sew a ground line alongside it. WS2812B data is timing-sensitive; below ~30 cm of thread it's usually happy at wearable brightness.
CMozGlow drives the LEDs with the ESP32-S3's RMT peripheral — a piece of hardware that generates the WS2812B's fussy 800 kHz waveform all by itself — and it does so asynchronously: show() builds the frame (using a precomputed byte→waveform lookup table), hands it to the hardware, and returns immediately while the LEDs are still being painted. The mandatory ≥280 µs "latch" gap is encoded into the tail of every hardware transfer, so there is no busy-waiting anywhere in the library. The next show() simply checks the previous frame has left the wire — which it long since has at any normal frame rate.
The practical result: on a 200-LED strip, a traditional blocking send freezes your sketch for ~6 ms every frame; CMozGlow hands it off in roughly 100 µs. Add AutoPilot and the cost to your loop() is zero.
It works on both arduino-esp32 core 2.x and 3.x automatically, and is thread-safe throughout.
Made with 💛 in Canada · MIT licensed · Tutorials on the CMozMaker YouTube channel · Parts & conductive fabrics at TinkerTailor.ca
Downloads for this Product